Difference between revisions of "Beginner's tutorial step 1"
From ArmadeusWiki
| Line 20: | Line 20: | ||
Image:rs232cable_connected.png|RS-232 Null Modem cable connected on the development board | Image:rs232cable_connected.png|RS-232 Null Modem cable connected on the development board | ||
Image:miniUSB_cable_connected.jpeg|miniUSB cable connected on the APF51Dev development board | Image:miniUSB_cable_connected.jpeg|miniUSB cable connected on the APF51Dev development board | ||
| − | Image:miniUSB_cable_connected_apf6dev.png|miniUSB cable | + | Image:miniUSB_cable_connected_apf6dev.png| where to connect the miniUSB cable on the APF6Dev development board |
</gallery> | </gallery> | ||
[[Image:miniUSB_cable_connected_apf6dev.png]] | [[Image:miniUSB_cable_connected_apf6dev.png]] | ||
Revision as of 08:56, 1 July 2015
- Plug your APFxx module to your development board (custom or DevLight/DevFull) (your system will be hereafter referred to as "the Target")
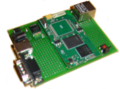
An APF9328 connected to a DevLight
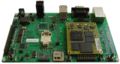
- Apf9328 on devfull.jpg
An APF9328 connected to a DevFull
An APF27 connected to a Dev27
An APF51 connected to an APF51Dev
An APF28 connected to an APF28Dev
An APF6_SP connected to an APF6_SP_Dev
An APF6 connected to an APF6_SP_Dev


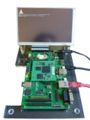
- On APF9328 & APF27: connect your PC (= "the Host") to your board with a standard null-modem RS-232 DB9 cable. If you don't have a RS-232 port on your Host, you can use a "USB <-> RS-232" converter (you'll still require the null-modem cable).
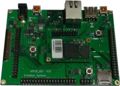
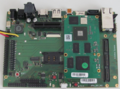
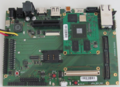
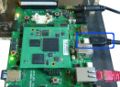
- On APF6 & APF6SP & APF51 & APF28: connect your PC (= "the Host") to your board with the delivered miniUSB cable.
- Rs232cable connected.png
RS-232 Null Modem cable connected on the development board
miniUSB cable connected on the APF51Dev development board
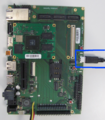
where to connect the miniUSB cable on the APF6Dev development board


- Connect your Target to your local network with an Ethernet Cable. If you don't own any network, you can use an Ethernet crossover cable to directly connect your Target and your Host.
| Navigation: | |
|---|---|
|
<< Previous step You are in step N°1 Next step >> | |